

How and Why you Need to Learn Manual Photography
- Joe D'Ambra
- May 29, 2020
- 5 min read
Updated: Nov 13, 2020
This is definitely one of the most popular topics for beginners. If you want to take your photography to the next level, you should learn how to shoot in manual. I'm not saying you can't take great images without. I'm just saying you will be a much better photographer if you understand what all those numbers and fractions mean on the back of your camera. Kinda scary at first right?

This all sounds really complicated to start with, believe me I know. Once you get going it will be a lot easier to understand.
So lets dive into it- first things first- aperture. Aperture isn't actually much to do with the camera its more the lens itself. So a high aperture is a low number (confusing right) this means that something like f 2.8 is a high aperture and f 22 is a low aperture. This is basically because the lens opens more when the aperture is lower and shuts more when its higher.
Just think of it like this- when Pacman's (the lens) mouth is wide you can get more white balls in there, the more you shut it the less balls you can fit in there. Pacman's mouth is your lens and the white balls are particles of light.

Then low numbers are an open mouth the higher the number goes the more you close your mouth. (Pacman likes low numbers- more food!).

More light = brighter shot, less light = darker shot.
Ok, so let's move on to shutter speed. Your shutter speed determines the amount of time your sensor is exposed to the scene. The faster the shutter closes the less light will be let into the camera, and the slower the more light will be let in.
So think of it like floodgates opening. The longer they open for the more water gets in right? And if you open them quickly then not much water is going to come in. Obviously this depends on how much water (light) is around!
Then the final part of the triangle is ISO. Just think of it as a volume knob. The more you turn it up the brighter the image will become. Turning it down will make the image darker. So which is going to be brighter- ISO 100 or ISO 1600?

I hope you said ISO 1600!
You're probably now thinking. Well all three of these controls effects how much light is being let into the image. But why are there 3 different controls, why not just one?
Because each control has a side effect.
Aperture controls the depth of field! This is the amount you see! So going back to the Pacman- when his mouth is open he can't see as much! When his mouth is more closed he can see a lot more. Let me show you what I mean by depth of field.
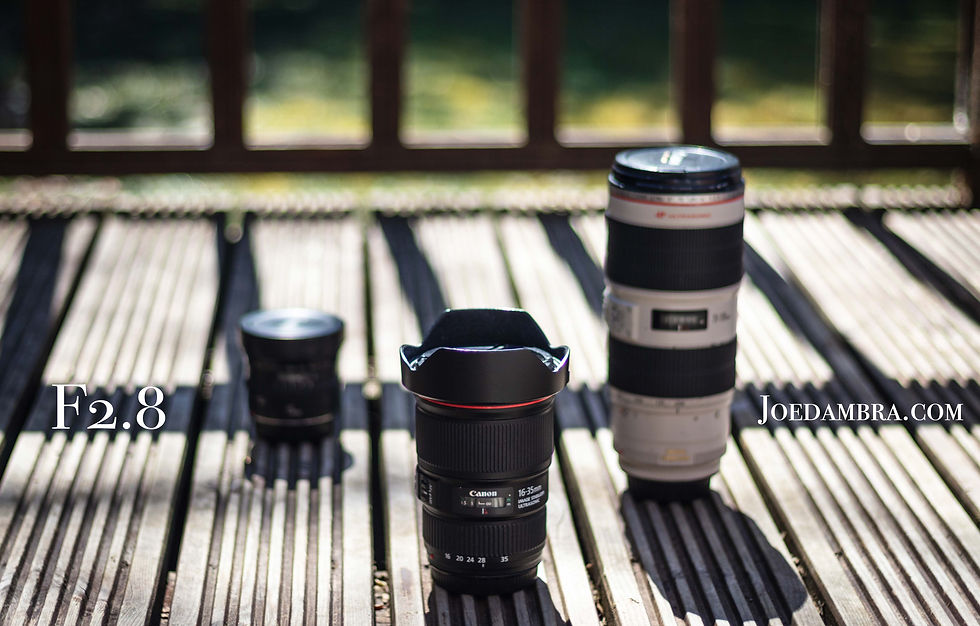
At f2.8 (mouth wide open) you have a low depth of field meaning a large amount of the picture will be blurred. Leaving just the lens hood in this case in focus.

At lower apertures- f22 everything in the photo is clear and in focus. Letting less light in.
Bare in mine in order to get both of these photos to a similar brightness I had to adjust the other two settings- iso and shutter speed. Now you starting to understand?
Don't worry if not. I'll explain some more- the side effect of shutter speed is motion blur. So the longer the shutter is open the longer the camera is recording the photo. So if you photographed something really fast moving like a cheetah with a slow shutter speed you would get a blur.

As you can see in the above image, low shutter speed (and movement) caused the image to blur!
If you wanted to make this photo sharp you would have to make the shutter speed faster so maybe from 1/50s to 1/400s.
Just to clarify the s stands for second so you can do a 5s exposure- 5 second or a 1/30s exposure - 1 30th of a second or 1/2000s exposure so 1 2000th of a second. As the fraction gets larger the quicker the shutter speed making the image darker and sharper- hey that kinda rhymes!
You can use slow shutter speeds- ideally with a tripod (once you go quicker than 1/30s you are much better off not touching the camera while its taking the shot). I mean you aren't going to hold a camera 100% still for even 1 second- try it you'll see what I mean!

You can get cool effects like this using slow shutter speeds- the shutter speed was 5 seconds. This recorded the movement of the water for 5 seconds.
Have a play around with your shutter speed - night time is when it will be a lot of fun! Especially with a tripod! Follow that link for a great first tripod- I'd highly recommend. Works on any camera and its well worth investing a bit in a tripod. The cheaper ones aren't so good and will break easily. That will last you years and keep your images really stable.
Anyway, finally we come onto ISO. Remember that volume knob thing I was talking about. Turning it up makes it brighter and down darker. When you turn it up the image gets more grainy.

Can you see all the grain in the image? Thats from shooting at a high ISO like 3200. A lot of photographers tell you to avoid high ISO and to shoot at low ISO like 100 if possible. Which to be honest I do myself. Shooting at a low ISO will prevent grain coming into your image and make it look cleaner. However this can be a really cool effect and a nice style which some photographers like to use. So if you like this effect don't be afraid to use a high ISO.
All in all, you just want to balance the three of these to make a good exposure then play around to get creative. So say if your settings were 1/200 f11 and ISO 100 and you were getting a nice exposure. You might want to reduce the depth of field (blur the background) and not increase the grain (ISO) so you would increase the shutter speed to let less light in through the shutter say 1/2000 keep your ISO at 100 then raise your aperture (open the mouth) to f2.8.
The best thing to do if you are still struggling to understand it all working together is concentrate on one and then merge them all together. Your camera will have an aperture priority mode and a shutter priority mode. You can out how to do this in the camera manual or just google your camera along with aperture priority mode if you don't know how to do this. Concentrate on that setting, remember what I told you and look at the difference it is making to your picture.
Let me know how you get on with it! Join my facebook group here and post a comment.


Comments